BYOGD - Be Your Own Graphic Designer
Tools and tricks you must know
Learn how to create kick-a** graphic design by yourself. Make your own logo, website, social media images, downloadables and gifs without Photoshop or any previous experience. And all this for free!
Working with a professional graphic designer is amazing. But, let’s be real. If you’re about to build your own business, and you’ve just started, probably you don’t have the cash for that (yet). No worries, Canva has you covered.
Disclaimer: This post contains affiliate links. The post was last updated in June 2021.
Image sources: unsplash.com/@amyhirschi, pexels.com/@olenkasergienko, pexels.com/@julieaagaard
I’ve been planning to write this post since I’ve started my blog in 2018. From day 1 I’ve been using Canva to design the graphic elements of my brand, edit images for my website and to create social media posts and downloadables. Needless to say, I love it, and I bet you’ll love it too.
What is Canva.com?
Canva is a free online platform, where you can create various graphic designs using a super-easy drag-and-drop tool. Canva also offers 100+ free templates that you can use for inspiration or as a starting point.
Canva is a graphic design platform, used to create social media graphics, presentations, posters, documents and other visual content. The app includes templates for users to use. The platform is free to use and offers paid subscriptions like Canva Pro and Canva for Enterprise for additional functionality.
(Source: Wikipedia)
I love, that Canva doesn’t require you to install anything on your computer, allowing you to use the tool on any computer immediately. It also has a mobile app, so you can implement quick changes or tweak a social post on the go too. (All functionalities are available on the app too, but I wouldn’t start to design a brand new PDF on such a small screen.)
Free vs Pro
Free
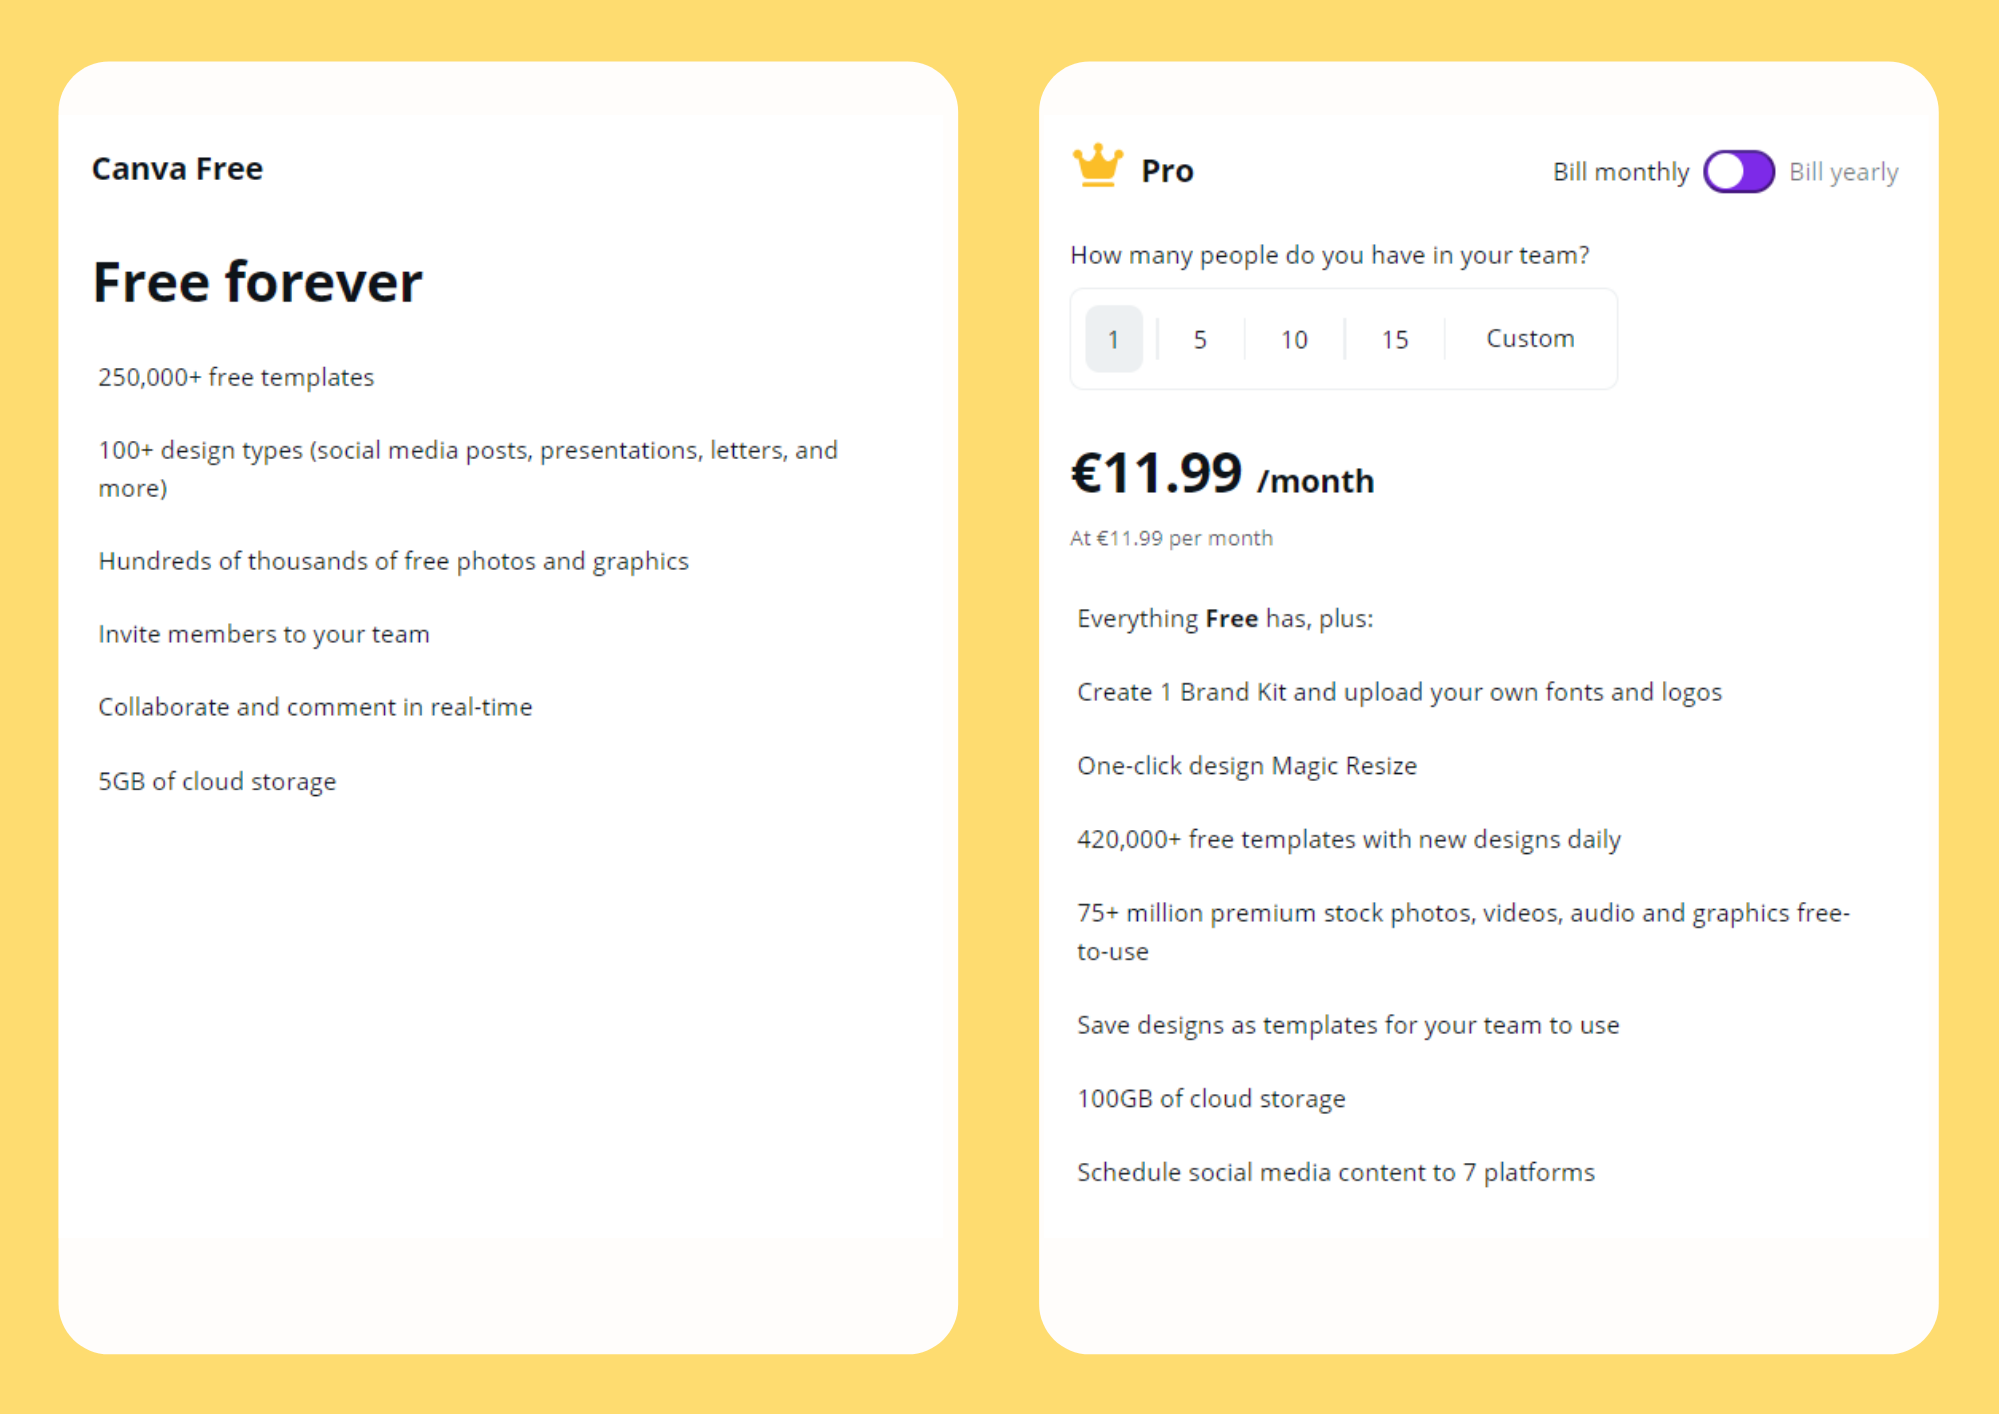
The good news: Canva is free to use – if you are willing to make a few compromises. The biggest setback of free is, that you can’t upload your brand kit, which means you have to set your brand’s fonts and colours every time you start a new design. Also, you can’t resize your existing design. If you need another size you have to start a new project, copy the elements and rearrange them. You should also forget to download transparent images. The full list is a bit longer, but these are the ones I miss the most.
I must admit, these can be annoying, but if you’re not a heavy user or you’re willing to allocate a bit more time to this part of your creative process it’s still an amazing tool. I still use the free version.
Source: Canva.com (August 2021)
Pro
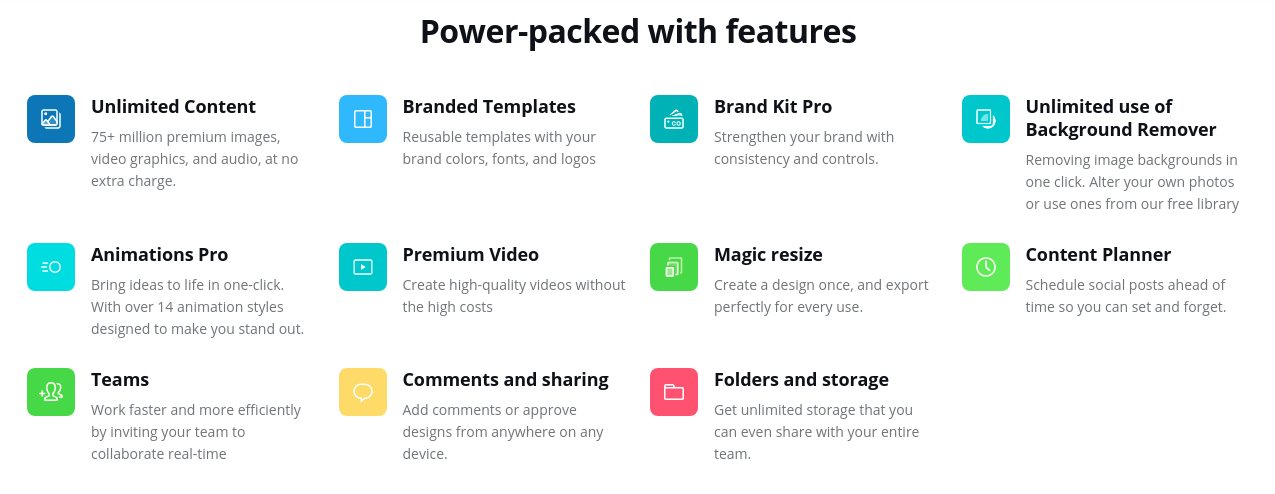
The Pro version can make your life easier. As I mentioned above it allows you to upload your brand kit and to have branded templates to ensure consistency. Also, resizing an existing design is literally only takes a click. It’s also a must if you often have to remove image backgrounds or have to export a transparent png.
Furthermore, you can pick from more free stock images and videos or you can create your own video if you wish. You can enjoy a new level of comfort with more folders and storage and a content planner. Pro is also (almost) a must if you work with a team, because it offers real-time collaboration.
Not sure yet? Canva offers a 30-day trial to everyone.
Source: Canva.com (June 2021)
Tips and Tricks
Canva has a lot to offer, and it can be overwhelming at first sight, so I wanted to showcase to you my absolute favourite features – all from the free plan.
Custom size
Canva offers tons of pre-set sizes, but you can also pick any size you wish by clicking Create design > Custom dimensions. It can be useful to fit custom dimensions in WordPress.
Animated social media posts
Video formats are ruling on social media generating higher engagement, than statics. Using Canva you have 3 options to make your image interactive easily. (Don’t forget to export as mp4 instead of png.)
1) Add animated stickers. – Under the Elements tab > Graphics > Stickers you’ll find some cute animations, like arrows, sparkles or circles.
2) Add a video as background. – Browse Canva (Elements tab > videos) or upload your own video. Check out these 10 sites for more free images and videos.
3) Animate the elements on the image. – Above the design there is an Animate button with option, like Fade, Photo Zoom or Block.
Block animation at Canva.com
Download the Complete WFH eBook by clicking here.
Have your brand board rEADY
If you’re paying for Pro you don’t have to worry about it, but as a Free user you’ll need your brand elements (especially colours and fonts) ready. You can create a Canva design just to store these and you can Copy + Paste them to every new design you start or you can use a separate document to use as a cheat sheet. If you’re not familiar with the concept of a brand board I suggest reading this blog post first.
sAVE ELEMENTS AND IMAGES FOR LATER
When I browse among Elements I often find ones, that I know I could use later. Just click on the 3 dots at the upper right corner of that element and choose to Add to Likes. When you want to review your selections go to Folders > Likes.
Organise using folders
The free plan offers up to 2 folders to keep your designs organised and I strongly advise you to take advantage of it. On the home page, you can click on the top right corner of your designs and move them to an existing or a new folder.
